How to Install the Latest Nginx on Rocky Linux
Introduction
Nginx is a web server designed to be fast, efficient, and compatible with just about anything you can imagine. I personally use it a fair bit and—once you get the hang of it—it’s actually pretty easy to set up and configure. To that end, I've written this beginner's guide.
Here’s a short rundown of the ways Nginx stands out/features it has:
- A basic web server
- A reverse proxy for directing traffic to multiple sites
- A built-in load balancer for managing traffic to multiple websites
- Built-in file caching for speed
- WebSockets
- FastCGI support
- And, of course, IPv6
It’s great! So just sudo dnf install nginx, right? Well, not exactly. We just have to enable the right module first, to enable the "mainline" branch, so you can have the latest version of Nginx.
Note
There's another branch called "stable", but it's actually a little outdated for most use cases. It will receive no new features as they are developed, and only the most urgently-needed bug fixes and security upgrades.
The developers of Nginx consider the "mainline" branch to be well-tested and stable for general use, as it gets all new features, all security fixes, and all bug fixes.
The only reasons to use the "stable" branch include: * You really want to be sure that new features and big-fixes won't break any third-party code or custom code of your own. * You want to stick with the Rocky Linux software repositories only.
A tutorial at the end of this guide will detail how to enable and install the "stable" branch with minimal fuss.
Prerequisites and Assumptions
You’ll need:
- An internet-connected Rocky Linux machine or server.
- A basic familiarity with the command line.
- The ability to run commands as root, either as the root user or with
sudo. - A text editor of your choice, whether graphical or command-line based. For this tutorial, I’m using
nano.
Installing the Repository & Enabling the Module
First, make sure your machine is updated:
sudo dnf update
Then, install the epel-release software repository:
sudo dnf install epel-release
Then enable the right module for the latest version of nginx. This module will always be called nginx:manline, so just enable it with dnf like so:
sudo dnf module enable nginx:mainline
It'll give you the usual "Are you sure you want to do that?", but this isn't 2nd Edition D&D with Gary Gygax himself, so yes. Of course you do. Hit Y to confirm.
Installing and Running Nginx
Then, install the package nginx from the previously added repository:
sudo dnf install nginx
The terminal will ask you if you’re fine with installing the repository’s GPG key. You need that, so choose Y for yes.
Once the installation is done, start the nginx service and enable it to automatically start on reboot all in one go with:
sudo systemctl enable --now nginx
To verify that the lastest version of Nginx has been installed, run:
nginx -v
From there, you could just start dropping HTML files into the /usr/share/nginx/html/ directory to build a simple, static website. The configuration file for the default website/virtual host is called “nginx.conf” and it’s in /etc/nginx/. It also holds a number of other basic Nginx server configurations, so even if you choose to move the actual website config to another file, you should probably leave the rest of "nginx.conf" intact.
Configuring the Firewall
Note
If you are installing Nginx on a container such as LXD/LXC or Docker, you can just skip this part for now. The firewall should be handled by the host OS.
If you try to view a web page at your machine’s IP address or domain name from another computer, you’re probably going to get nothing. Well, that’ll be the case as long as you have a firewall up and running.
To open up the necessary ports so that you can actually "see" your web pages, we will use Rocky Linux's built-in firewall, firewalld. The firewalld command for doing this is firewall-cmd. There are two ways to do it: the official and manual. In this instance, the official way is best, but you should know both for future reference.
The official way opens up the firewall to the http service, which is of course the service that handles web pages. Just run this:
sudo firewall-cmd --permanent --zone=public --add-service=http
Let’s break this down:
- The
-–permanentflag tells the firewall to ensure this configuration is used every time the firewall is restarted and when the server is restarted. –-zone=publictells the firewall to take incoming connections to this port from everyone.- Lastly,
--add-service=httptellsfirewalldto let all HTTP traffic through to the server.
Now here's the manual way to do it. It's pretty much the same, except you're specifically opening up port 80 that HTTP uses.
sudo firewall-cmd --permanent --zone=public --add-port=80/tcp
–-add-port=80/tcptells the firewall to accept incoming connections over port 80, as long as they’re using the Transmission Control Protocol, which is what you want in this case.
For SSL/HTTPS traffic, just run the command again and change the service or the port number.
sudo firewall-cmd --permanent --zone=public --add-service=https
# Or, in some other cases:
sudo firewall-cmd --permanent --zone=public --add-port=443/tcp
These configurations won’t take effect until you force the issue. To do that, tell firewalld to relead its configurations, like so:
sudo firewall-cmd --reload
Note
Now, there’s a very small chance that this won’t work. In those rare cases, make firewalld do your bidding with the old turn-it-off-and-turn-it-on-again.
systemctl restart firewalld
To make sure the ports have been added properly, run firewall-cmd --list-all. A properly-configured firewall will look a bit like this:
public (active)
  target: default
  icmp-block-inversion: no
  interfaces: enp9s0
  sources:
  services: cockpit dhcpv6-client ssh http https
  ports:
  protocols:
  forward: no
  masquerade: no
  forward-ports:
  source-ports:
  icmp-blocks:
  rich rules:
And that should be everything you need, firewall-wise.
Now you should be able to see a web page that looks something like this:
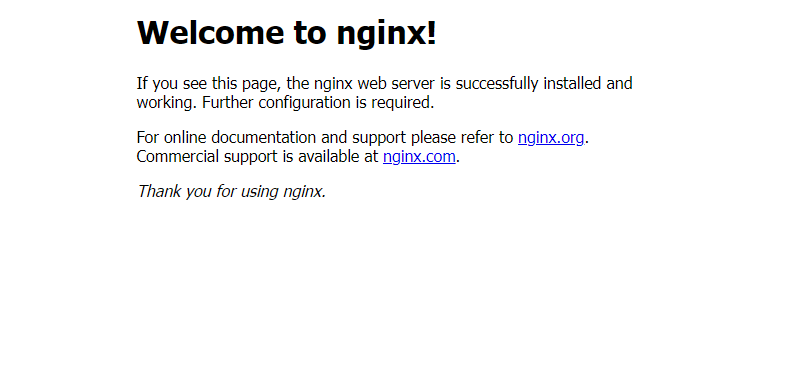
It’s not much at all, but it means the server is working. You can also test that your web page is working from the command line with:
curl -I http://[your-ip-address]
Creating a Server User and Changing the Website Root Folder
While you can just drop your website into the default directory and go (and this might be fine for Nginx when it’s running inside a container, or on a test/development server), it’s not what we call best practice. Instead, it’s a good idea to create a specific Linux user on your system for your website, and put your website files in a directory made just for that user.
If you want to build multiple websites, it’s a good idea to create various users and root directories for organization and security.
In this guide, I’m going to have just the one user: a handsome devil named “www”. Deciding where to put your website files gets more complicated.
You can put your website files in several places depending on your server setup. If you're on a bare-metal (physical) server, or you're installing nginx directly on a VPS, you probably have Security Enhanced Linux (SELinux) running. SELinux is a tool that does a lot to protect your machine, but it also kind of dictates where you can put certain things, like web pages.
So if you're installing nginx directly to your machine, you'll want to put your websites in the default root folder subdirectories. In this case, the default root is /usr/share/nginx/html, so the website for the “www” user might go into /usr/share/nginx/html/www.
If you're running nginx in a container such as LXD/LXC, however, SELinux will likely not be installed, and you can put your files wherever you like. In this case, I like to put all of a user's website files under a directory in a normal home folder, like so: /home/www/.
I'll continue this guide as though SELinux is installed, though. Just change what you need to based on your use case. You can also learn more about how SELinux works in our guide on the subject.
Creating the User
First, we make the folder we’re going to use:
sudo mkdir /usr/share/nginx/html/www
Next, create the www group:
sudo groupadd www
sudo adduser -G nginx -g www -d /usr/share/nginx/html/www www --system --shell=/bin/false
That command tells the machine to:
- Make a user called “www” (as per the middle bit of text),
- put all of its files in
/usr/share/nginx/html/www, - and add it to the following groups: “nginx” as supplemental , “www” as primary.
- The
--systemflag says that the user is not a human user, it's reserved for the system. If you want to create human user accounts to manage different websites, that's a whole other guide. --shell=/bin/falsemakes sure no one can even try to log in as the “www” user.
The “nginx” group does some real magic. It allows the web server to read and modify files that belong to the “www” user, and the “www” user group. See the Rocky Linux guide to user management for more information.
Changing the Server Root Folder
Now that you have your fancy new user account, it’s time to make nginx look for your website files in that folder. Grab your favorite text editor again.
For now, just run:
sudo nano /etc/nginx/conf.d/default.conf
When the file is open, look for the line that looks like root /usr/share/nginx/html;. Change it to your chosen website root folder, eg. root /usr/share/nginx/html/www; (or /home/www if you're running nginx in containers like I do). Save and close the file, then test your nginx configuration to make sure you didn’t skip a semi-colon or anything:
nginx -t
If you get the following success message, everything went right:
nginx: the configuration file /etc/nginx/nginx.conf syntax is ok
nginx: configuration file /etc/nginx/nginx.conf test is successful
Then, give the server a soft restart with:
sudo systemctl reload nginx
Note
In the unlikely event that the soft restart doesn’t work, give nginx a kick in the pants with:
sudo systemctl restart nginx
Any HTML files in your new root folder should now be browsable from… your browser.
Changing File Permissions
Permissions must be set correctly to ensure that nginx can read, write, and execute any files in the website directory.
First, make sure that all files in the root folder are owned by the server user and its user group with:
sudo chown -R www:www /usr/share/nginx/html/www
And then, to ensure that users who want to browse your website can actually see the pages, run these commands (and yes, those semicolons matter):
sudo find /usr/share/nginx/html/www -type d -exec chmod 555 "{}" \;
sudo find /usr/share/nginx/html/www -type f -exec chmod 444 "{}" \;
That basically gives everyone the right to look at files on the server, but not modify them. Only the root and server users get to do that.
Getting SSL Certificates for Your Site
As of now, our guide to getting SSL certificates with certbot has been updated with some basic instructions for nginx. Go give that a look, as it has full instructions for installing certbot, as well as generating the certificates.
The time is coming when browsers might stop letting people see sites without certificates, so ensure you get one for every site.
Additional Configuration Options and Guides
- If you want to see how to make Nginx work with PHP, and PHP-FPM specifically, check out our guide to PHP on Rocky Linux.
- If you want to learn how to set up Nginx for multiple websites, we now have a guide on just that subject.
Installing the Stable Branch From Rocky's Own Repos
If you want to use the “stable” branch of nginx, even with its limitations, here's how you do it. First, make sure your OS is updated:
sudo dnf update
Then, look for the latest nginx version available in the default repos with:
sudo dnf module list nginx
That should get you a list that looks like this:
Rocky Linux 8 - AppStream
Name       Stream        Profiles        Summary
nginx      1.14 [d]      common [d]      nginx webserver
nginx      1.16          common [d]      nginx webserver
nginx      1.18          common [d]      nginx webserver
nginx      1.20          common [d]      nginx webserver
Choose the highest number on the list, and enable its module like so:
sudo dnf module enable nginx:1.20
You'll be asked if you're sure you want to do this, so just enter Y. Then, use the default command to install nginx:
sudo dnf install nginx
Then you can enable the service and configure your server as detailed above.
Note
The default configuration file, in this case, is in the base nginx configuration folder at /etc/nginx/nginx.conf. The root website folder is the same, though.
SELinux rules
Beware that when enforced, nginx proxy_pass directives will fail with "502 Bad Gateway"
You can either disable setenforce for development purposes
sudo setenforce 0
or you can enable http_d or other services that related to nginx in /var/log/audit/audit.log
sudo setsebool httpd_can_network_connect 1 -P
Conclusion
The basic installation and configuration of nginx are easy, even if it’s more complicated than it should be to get the latest version. But follow the steps, and you’ll have one of the best server options up and running quickly.
Now you just have to go and build yourself a website? What could that take, another ten minutes? Sobs quietly in Web Designer
Author: Ezequiel Bruni
Contributors: Antoine Le Morvan, Steven Spencer, Ganna Zhyrnova